让博客被搜索引擎检索到
一、查看是否被收录
首先查看你的博客地址是否已经被Google收录,在Google的搜索栏中搜索:site:https://xxxx.github.io,其中 https://xxxx.github.io 为你的博客地址,如果结果是提示您尝试使用Google Search Console,则意味着没有被收录。
如果搜索出你想要的结果,那么不用继续往下看了。
二、搜索资源提交
进入Google Web Master,点击: Google Search Console(若未登录谷歌账号,需要先登录谷歌账号),然后点击立即使用
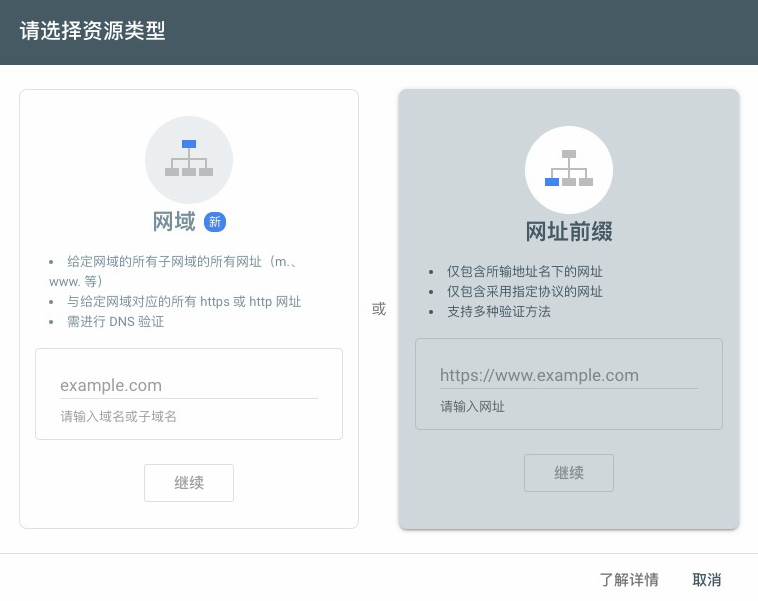
点击网址前缀添加(网域方式验证方式单一,推荐网址前缀),提交你的博客网址,然后跳转到如下界面进行验证。

验证方式有一下几种,根据实际情况,按要求验证即可。
我这里选了DNS解析验证,加入一条TXT类型的记录即可

三、添加站点地图
站点地图(Site Map)是用来注明网站结构的文件,我们希望搜索引擎的爬虫了解我们的网站结构,以便于高效爬取内容,快速建立索引。
首先为 Hexo 安装 hexo-generator-sitemap 插件,在Hexo博客目录下运行:
1 | npm install hexo-generator-sitemap --save |
重新编译
配置 Hexo 的 _config.yml 文件,添加如下字段:
1 | sitemap: |
然后重新生成博客文件,运行
1 | hexo clean |
此时应该可以在 public 目录下看到 sitemap.xml文件了。
如果发现生成的 sitemap.xml里边链接全都是https://example.什么什么/,那就是在 Hexo 的 _config.yml 文件里的url没有设置,可以设置下想要生成的url的格式。并且也可以设置文件的访问路径,默认是permalink: :year/:month/:day/:title/,但是中文的title不利于谷歌收录。下边采用插件缩短链接。
1 | # URL |
将中文网页名称转换为固定字符串
hexo默认生成的页面是你的 title 名,即 title 是中文那么网站访问的路径也是中文,会被转移成一堆字符,这样是很不利于搜索引擎收录的,让我们使用插件来解决这个问题,安装缩短链接插件:
1 | npm install hexo-abbrlink --save |
hexo 的 _config.yml 添加如下配置:
1 | permalink: posts/:abbrlink.html |
安装完毕后此时再 clean ,hexo g 会发现所有文章里边多了生成abbrlink: 生成编号,然后在配置文件里修改permalink:
1 | # URL |
此时再 clean ,hexo g ,访问到的网页名称不再是中文,而是固定的字符串,访问路径也统一变成了article/:编号/,这种简单的访问路径比较利于搜索引擎收录。
添加/测试站点地图
记得添加之前,先尝试访问一下生成的sitemap.xml的url是否可以访问到,如果可以,就说明没有问题。接下来就提交站点地图。
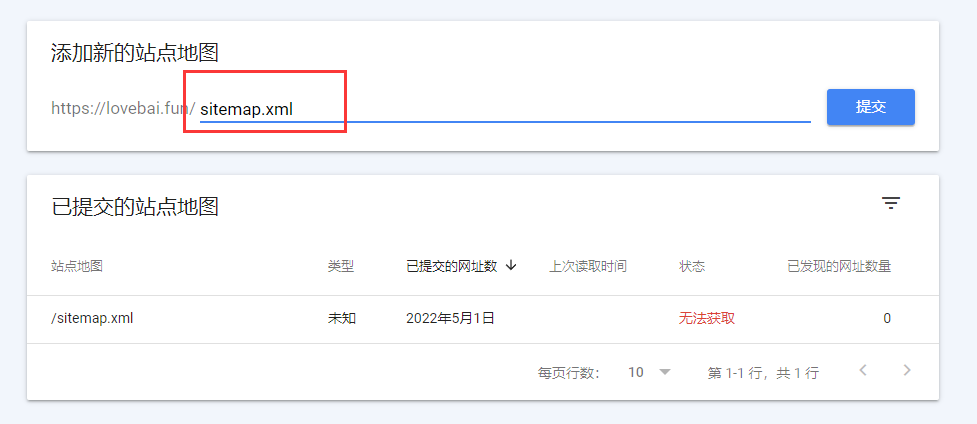
回到之前提交搜索资源的页面,在左边侧边栏找到 站点地图 ,添加新的站点地图,将https://你的博客仓库名/sitemap.xml提交并刷新,就可以看到博客的网站结构了。
例如:我的是仓库是 baixxq.github.io ,那就是 https://baixxq.github.io/sitemap.xml ,下图我这里用了域名解析。

OK,大功告成,静待谷歌收录。


